Yogyakarta Photography Tips
I am a hopeless photography nerd and I have shot these temples and volcanoes in every season, at every hour, from every angle I could reach. Here is what I have learned about light, timing, and the shots worth getting up in the dark for.
Let me be honest about who this page is for before we start. I am not a professional photographer. I am a Javanese temple guide who has carried a camera through two decades of dawns, and my camera has cost me money but bought me half my friendships on these hills. If you shoot with a phone and want to know where to stand and when, this page is for you. If you shoot with a full-frame sensor and a backpack of glass and you want focal lengths, aperture settings, and the exact minute the light turns, this page is also for you. I shoot the same way I guide: I tell you what works, what does not, and what you will only learn by standing in the right place at the wrong hour and watching the shot you wanted disappear.
The single most useful piece of photography advice I can give you for Yogyakarta is also the simplest: book your access in advance. The best light in Central Java falls on a small number of heavily capped locations, and the photographers who plan their slots a week ahead get the frame. The photographers who try to sort it out on the day get the courtyard. If you want to be in position on the Borobudur terraces when the sun strikes the stupas, the guaranteed ClimbUP tour locks your summit slot in writing and removes the quota gamble that has ruined more photo plans than any cloudy sky ever could. It runs at 4.96 stars from 157 travellers and the climb access is the whole point. But read on, because the climb ticket is only one piece of the puzzle, and different shots need different tours, different hours, different seasons entirely.
My name is Rama Kusuma. I live in Sleman on Merapi's southern slope, and I have guided these temples since 2006. The advice below comes from standing on Setumbu Hill at 4 a.m. in the cold, from dropping sixty metres into Jomblang with a drone in my pack, from waiting on the Prambanan lawn for the last light to rake the carvings sideways, and from the twenty unplanned minutes I once spent stuck in a dead jeep on the Merapi lava track, which turned out to give me the finest frame of the morning. I will walk you through each location in the order you will want to shoot it: dawn, mid-morning, golden hour, and night. Then I will tell you which tours put a photographer in the right place at the right hour.
Setumbu Hill at dawn: the silhouette everyone wants
Setumbu Hill sits about four kilometres west of Borobudur, rising to roughly four hundred metres above the Kedu plain, and the shot is the one you have seen a hundred times: the temple as a dark silhouette against a pale sky, morning mist pooling in the valley, Mount Merapi and Merbabu stacked behind it on a clear morning. It is the classic Borobudur photograph, and it is also the most misunderstood shot on this island, because half the photographers who climb that hill arrive at the wrong minute and leave with a grey temple against a grey sky and wonder what they did wrong.
Here is what works. The gate opens around 4 a.m., and in the dry season, May to September, you want to be standing on the viewing platform by 5 a.m. at the latest, because the pre-dawn colour starts building twenty minutes before the sun actually breaks the horizon. The best light lasts roughly fifteen to twenty minutes, and then the sun climbs above the mist and the scene goes flat. Do not arrive at sunrise itself. Arrive before it. The ticket is separate from Borobudur entry, around IDR 60,000 for foreigners, and it is a short uphill walk from the car park to the viewing platform, maybe ten minutes on a paved path, no serious fitness needed.
The gear. A telephoto lens in the 70-200mm range is ideal for pulling the temple closer against the volcano backdrop; anything wider makes the temple a tiny dot and the frame all sky. I shoot this at f/8 to f/11 on a tripod because the pre-dawn light is thin and handheld shots at ISO 3200 will be noisy. If you only have a phone, prop it against the railing and use a timed shutter; the platform rail is solid and it works better than you would expect. The mistake I see most often is photographers showing up with only a wide-angle lens and then cropping the shot to a grainy mess afterward. Bring the reach. The temple is four kilometres away.
The honest trade-off: Setumbu gives you the misty silhouette with the volcano behind. What it does not give you is the temple itself, up close, with light on the stone. For that you need to be on the terraces, which is a different ticket, a different starting point, and a different kind of morning entirely. I cover that choice in my Borobudur sunrise guide in detail. The short version is this: on a clear dry-season morning, skip Setumbu and shoot from the temple terraces, because the sun strikes the stupas directly and the stone goes gold. Save Setumbu for the misty mornings when you want silhouette and mood.
Jomblang Cave beam: the shot that only works on the right morning
The Heaven's Light beam in Jomblang Cave is the most extraordinary photograph you can take in Gunungkidul, a single column of sunlight pouring through a gap in the cave roof and landing on the chamber floor, and it is also the shot most likely to not happen on the day you booked. I say this plainly because I have watched photographers descend that sixty-metre rope, set up their gear in the Grubug chamber, and wait an hour for a beam that never came. The clouds won that morning, and no lens in the world can fix that.
The beam requires direct sunlight, nearly overhead, which means late morning, roughly ten to noon, on a day with minimal cloud cover. This is a dry-season shot, May to October, and even then the hit rate is maybe three out of four. In the wet season, November to March, the odds drop below half. You book the morning slot, you watch the weather forecast for three days before, and you accept that nature does not take reservations. The daily cap is small, around twenty-five people in the prime window, so you book a week ahead or you book nothing at all.
Gear. This is one of the few places in Yogyakarta where a drone genuinely earns its place in your pack. The Jomblang and Pindul shared tour with drone option runs a perfect 5.0 from thirty travellers and the operator is drone-friendly, which matters, because not every Jomblang operator is. The sinkhole from above is a frame you cannot get from the ground: the vertical shaft looking down into the green collapse-doline, and on a clear morning, the beam itself from above. Fly carefully. The cave is humid and GPS is unreliable underground; your battery life will be shorter than you expect and you should be comfortable flying manually. A wide-angle lens on the cave floor, 14-24mm at f/2.8 to gather as much light as possible in the dark chamber, with the beam as your key light, is the classic ground shot. Bring a lens cloth. The cave floor is wet clay and the humidity fogs glass fast.
On the ground, the shot everyone chases is a wide frame of the beam landing on the cave floor with the dark walls framing it. Position yourself so the beam falls diagonally across the frame rather than straight down; the diagonal reads better and gives you more of the chamber for context. Expose for the beam, not the dark walls, because the beam is the subject and blown highlights on a column of light ruin the whole image. If you have a model, have them stand in the beam looking up; the scale of a human figure against the shaft of light tells the story the wide empty cave shot cannot.
Prambanan golden hour: raking light on ninth-century carvings
Prambanan at golden hour is the temple photograph most visitors miss, because the standard tour bus arrives mid-morning and leaves before lunch, when the light is harsh and the carvings are flat. The shot you want is late afternoon, roughly 4 p.m. to 5:30 p.m., when the sun drops low enough to rake sideways across the Ramayana relief panels on the inner balustrade of the Shiva temple. The carvings, which read flat and grey under the midday sun, suddenly pop with shadow and depth. Every figure gains a face.
The practical problem is that Prambanan closes around 5 p.m., so your window is narrow. You want to be inside the complex by 3:30 p.m., working the inner balustrade clockwise, pradaksina, the way the temple is meant to be read, and chasing the light as it moves across the stone. A 24-70mm zoom covers the range you need, relief details at the long end, a wider temple-and-sky frame at the short end. The direct sun on the spires at the last light, just before the gates close, turns the grey andesite golden, and that frame, the soaring Shiva temple lit from the side with a deep blue sky behind it, is the Prambanan photograph. Shoot it from the lawn on the eastern side where the light falls cleanest. Bring a polariser if you have one; the tropical sky can wash out and a polariser deepens the blue behind the stone.
The companion shot most photographers skip is Sewu Temple, the Buddhist complex just north of Prambanan inside the same archaeological park. Walk there first, around 3 p.m., before you move to the Shiva temple. The light hits Sewu's carved stupa niches from a low angle that the morning tour groups never see, and you will have the frames almost to yourself. Then circle back to the main Shiva temple as the light drops. That sequence, Sewu first, Shiva second, is the one I use with every photographer I guide through this site.
Merapi lava at night: the volcano in the dark
Merapi is an active volcano and on the right night, from the right distance, you can photograph the lava glow. This is not a shot you get from the standard daytime jeep tour. You need to be on the slope after dark, and you need the mountain to be cooperating, which she does on her own schedule. The best lava-glow viewing is during elevated alert periods when the summit dome is active, and you need to be outside the exclusion zone that BPPTKG, the volcano monitoring agency, draws around the crater. A telephoto lens, 200mm or longer, on a solid tripod, from a safe distance at Kaliurang or a nearby high point, is how the shot works. Exposures run several seconds and a remote shutter release keeps your hands off the camera.
I am going to be blunt about safety here because I have seen photographers push too close for a better frame. The exclusion zone is not a suggestion. In 2010 Merapi killed over three hundred and fifty people, and the pyroclastic flows move faster than any human can run. Stay inside the radius BPPTKG sets, shoot from the permitted areas, and if a local guide tells you to move back, you move back. The photograph is not worth your life, and I say that as someone whose camera bag has been a permanent fixture on this mountain for twenty years.
During the daytime jeep tour, the photography is documentary rather than landscape. The black volcanic dust, the half-buried houses, the melted clocks in Museum Sisa Hartaku, these are images of memory, not beauty, and they need a different approach. Shoot close, shoot detail, let the texture carry the frame. A standard zoom at f/5.6 to f/8, polariser on to cut the glare off the black dust, and be prepared for your gear to get coated. The dust gets into everything. I keep a zip-lock bag over my camera between stops and I still come home grey.
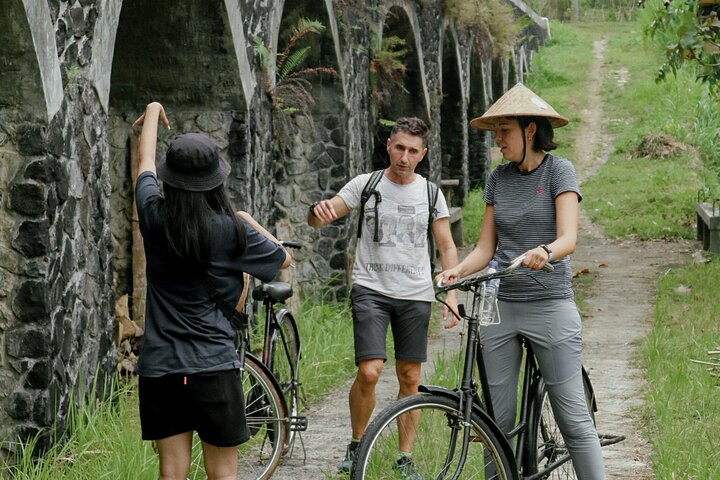
Village cycling candids and wet-season tricks
The cycling routes through the rice fields west of the city, toward the Menoreh Hills, and the old streets of Kotagede southeast of the centre, give you something the temples cannot: people doing ordinary things in extraordinary light. A farmer cutting rice at dawn with the mist still on the paddies, a silversmith at his bench in Kotagede with the morning sun through his workshop window, a tofu maker pressing curd by hand. These are the photographs that tell the Java the temple visitors drive straight past.
A 35mm or 50mm prime at f/2.8 or wider is the right tool. You want to isolate the subject from the background, and the shallow depth of field does the work. Shoot from the saddle or hop off when something catches your eye; the cycling pace is slow enough that you can stop without disrupting the group. Ask before you photograph someone working. A smile and a few words of Indonesian, boleh foto?, is the minimum courtesy. Most people will say yes, and the photograph you get after asking is always better than the one you sneak.
The wet season, November to March, is not a write-off for photography. The mornings are often clear before the afternoon storms roll in, and the rice fields are at their greenest, a deep emerald you do not get in the dry months. The clouds add drama to the temple skies that a flat blue sky cannot match. The trade-off is obvious: sunrises are less reliable, the Jomblang beam is a gamble, and you will get rained on at least once. Bring a rain sleeve for your camera, a dry bag for your gear, and a lens cloth you can access without opening your whole pack. The wet season rewards preparation and punishes the casual. I keep a small silica gel pack in my camera bag to pull moisture out after a wet morning; it costs nothing and has saved my glass more than once.
Three photography-friendly tours, matched to the shot you want
Not every tour operator is patient with a photographer who wants to wait for the light. These three are. Each one puts you in position at the right hour, and each one has proven that they understand the difference between a photo stop and a photo session.
The classic first-light sweep: Setumbu Hill silhouette at dawn, then the temples
If you want the Setumbu Hill silhouette with the volcano behind, this is the tour that puts you on the viewing platform before the colour starts. The Borobudur Sunrise from Setumbu Hill, Merapi Volcano and Prambanan full-day tour is the most-reviewed option at 4.91 stars across more than a thousand travellers, and it starts you in the dark on the hill with the mist lifting off the Kedu plain. You get the silhouette shot, then the Borobudur climb, then the Merapi jeep country, then Prambanan. Four distinct photographic environments in a single long day.
The honest note for photographers: this is a twelve-hour marathon, and by the time you reach Prambanan the light is mid-afternoon, not golden hour. If you want the raking-light Prambanan shot I described above, this tour will not deliver it, you will be there too early and the sun will be overhead. But for the Setumbu silhouette and the temple climb in morning light, it is the tour I point most first-timers toward.
See dates & prices →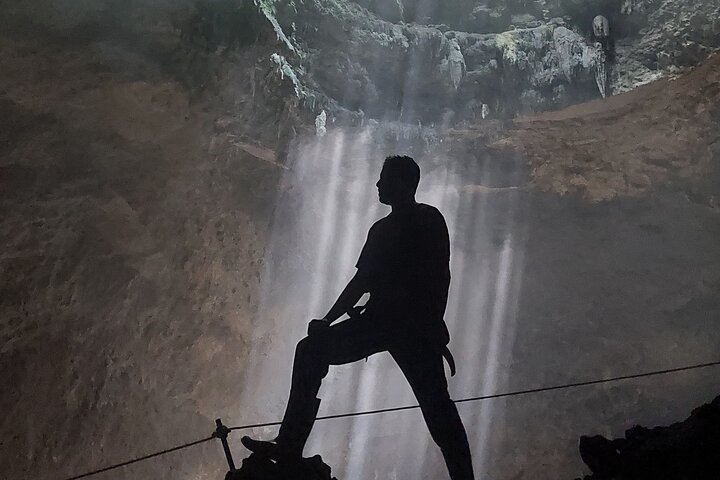
The cave photographer's choice: Jomblang with drone, the sinkhole from above
For the photographer who wants the Heaven's Light beam from the chamber floor and the sinkhole from above, the Yogyakarta Shared Tour: Jomblang and Pindul Cave with DRONE Option carries a perfect 5.0 across thirty travellers and the operator actively supports drone use, which is not true of every Jomblang operator. You descend the sixty-metre rope, wait for the beam in the Grubug chamber, and have the option of aerial footage looking down into the green collapse-doline. Shared tour pricing with a genuinely useful photographer add-on.
The trade-off: shared format means you move on the group's clock, not yours. If you want to linger in the beam for an extra ten minutes while the light shifts, a shared tour will not give you that. But for the price, this is a lot of cave and a lot of footage, and the drone option is the reason a photographer books this one over the others.
See dates & prices →
The summit photographer's tour: guaranteed Borobudur climb access for terrace shots
If you want to stand among the seventy-two bell-shaped stupas and shoot the light hitting the stone directly, you need the climb ticket, and you need it guaranteed. The Borobudur ClimbUP guaranteed with sunrise option and Prambanan day tour at 4.96 stars locks your summit slot in writing. On a clear dry-season morning the sun strikes the perforated stupas directly from the east, and the stone goes gold against a deep sky. The frame of a Buddha statue inside a stupa with the morning light falling through the diamond-shaped openings is the Borobudur photograph that Setumbu Hill can never give you.
Who should skip it: if you only want the silhouette shot from Setumbu, the guaranteed climb premium is wasted money. But if the summit terraces are the whole photographic point of your trip, this is the tour that removes the quota gamble and puts you where the light actually lands.
See dates & prices →How I choose which photography tours to recommend
I apply the same three checks to every tour on this site, in the same order. For photography tours, each check means something specific:
1. Guide quality. A photography-friendly guide is patient with the light. They understand that you want to wait five minutes for the cloud to move, that you need to set up a tripod at the lip of the sinkhole, that the group's schedule is not your only priority. I look for operators whose guides have tolerated photographers before and who will not rush you off a terrace when the frame is still building.
2. Safety record. In the caves and on the volcano this matters acutely. A photographer distracted by the shot can miss the shifting wind at Ijen or the wet ledge at Jomblang. The operators I recommend run crews who watch the conditions while you watch the view. The Merapi jeep driver who knows the dust track, the Jomblang rope crew who check your harness twice, these are the people who let you focus on the frame instead of your footing.
3. Value. Not cheapest, value. For photographers, value means the tour puts you in the right place at the right hour and does not fight you when you need an extra ten minutes. A cheap tour that rushes you past the light is no saving at all. I earn a commission when you book through these Viator links, at no extra cost to you, that is how the site stays free. It does not change which tours pass the three checks, and plenty of well-paying listings never make it onto this page.
Rama's photography rules
- Arrive before the light, not at it. Setumbu's best colour builds twenty minutes before sunrise. Prambanan's golden raking light starts an hour before close. The photographers who get the frame are standing in position before the magic starts, not scrambling to it as it happens.
- Book your access slots a week ahead. Borobudur's climb quota and Jomblang's daily cap are small, and they fill early. The light may or may not cooperate on the day, but the access either exists or it does not, and that part you can control.
- Bring the reach for Setumbu. A 70-200mm or longer. The temple is four kilometres from the viewing platform. Wide-angle shots of Setumbu are ninety percent sky and a tiny dark dot at the bottom. Bring the lens that pulls the temple close.
- Protect your gear from dust and humidity. Merapi's black volcanic dust coats everything. Jomblang's cave humidity fogs glass. A zip-lock bag between stops, a rain sleeve in the wet season, and a silica gel pack in your bag are cheap insurance that save your glass.
- Ask before you photograph people. A farmer, a silversmith, a cave crew. Two words, boleh foto?, and a smile change the photograph from a stolen moment to a shared one. The frame is always better after you ask.
- Stay inside the exclusion zone at Merapi, always. The lava glow photograph is not worth crossing the line BPPTKG draws. A telephoto lens from a safe distance gives you the frame without the risk. The mountain has killed before and she will again.
The mistakes I watch photographers make
The first and most common is arriving at Setumbu at sunrise itself instead of thirty minutes before. The colour starts before the sun breaks the horizon, and the photographers who time their arrival for the listed sunrise minute have already missed the best light. Get there early, set up in the dark, and wait. The platform is not crowded at 4:30 a.m. and you can stake your spot.
The second is bringing only a wide-angle lens to a location that demands reach. At Setumbu the temple is four kilometres away. At Merapi the lava glow is kilometres from the safe viewing points. A 24-70mm will not pull either subject close enough to fill the frame, and cropping a wide shot to a quarter of its pixels is not a substitute for the right glass.
The third is booking the Jomblang afternoon slot and hoping the beam will still be there. It will not. The beam requires the sun to be nearly overhead, and by 2 p.m. the angle has shifted past the cave opening. The morning slot is the only slot that gives you a chance. Book it, book it early in the week, and watch the forecast.
And the fourth, the one that sits closest to my heart, is treating the people in your photographs as scenery. I once watched a photographer at Ijen walk past a sulfur miner who had just hauled eighty kilos up the crater wall, framing the blue fire without a word to the man whose workplace it was. The miner who stopped to save a stranger's lungs from a gas pocket that same morning deserved better than to be invisible in the photograph. A few words, a fair tip, a small carved sulfur souvenir bought from the miner's own hand, these things change the photograph from an extraction to an exchange. The image carries it. You can feel the difference in the frame.
Let me leave you with the thing I carry in my camera bag that is not a lens. A few years ago I got so absorbed framing a stupa against the Borobudur dawn that I left my tripod on the upper terrace and only realised at the bus. A young attendant, a kid from the village below, ran it down to me. Instead of just thanking him I asked how he learned the light here, and he told me he had grown up watching the sunrise from the same terraces I was shooting. We still trade sunrise notes by message years later. My camera has cost me money, yes, but it has bought me half my friendships on these hills. Come to Yogyakarta with your glass and your tripod and your patience. But come also with the curiosity to ask the person beside you what the light means to them. The best photograph you take here will be the one where the connection is in the frame, not behind it.
Rama earns a commission when readers book through the Viator links on this site, at no extra cost to the traveller. This does not affect which tours are recommended, every tour passes three checks: guide quality, safety record, and value. Rama does not run a tour company. He does not sell packages.